|
|

|
| A picture from a real camera can contain faults due to camera optics. If, for example, the light from a light source shines directly into a camera, several lens flares appear in the camera's lens. This accounts for the well-known star, circle, or annular lens flares in the pictures. In the photo and film industry this effect is not always viewed with pleasure, and they often go to not inconsiderable expense to avoid this effect. However, people have become so accustomed to these picture faults that these effects you can help to considerably increase the degree of reality of computer-generated pictures.
|
| Here, in the light dialog, you can decide if such lens flares are to be generated for individual lamps or spotlamps. On the right side the light dialog, you have a large number of different parameters with which you can determine the type, intensity, and size of the flares for each light object. Furthermore, it also allows you to animate the light effects in various ways. By rapidly expanding light halos and rings and rotating the star-rays, you can simulate many effects - from the rising sun to light explosions. Apart from the buttons to switch on or off the lens flares for every individual light object there is also a global <Lens Flares> button in the render options dialog - which allows you to globally switch the lens flares of all light sources on or off.
|
|
|

|
| If you switch on the option <Visible light source> a spherical light halo is created about each light source. This halo consists of an inner circle defined by the Light Radius and an outer halo defined by the Halo Radius, where the color path of the light color fades towards the halo color. Simultaneously, the intensity of the halo reduces more and more towards the edge. If you also switch on the rainbow colored button, then a rainbow filter will be applied to the halo color range.
|
| The light radius is part of the basic light settings located on the left side of the dialog. If the halo radius entered here in the Lens Flares box is smaller than the light radius, then only the inner light circle is drawn without producing a halo effect.
|
|
|
| Intensity - Lens flares are additional intensities, added to the picture in post processing after finishing the picture calculation (exception - sun light objects are rendered as visible light spheres in the background as well as overlaid with the lens flare effects afterwards). The intensity parameter controls the intensity of the overlaid lens flares.
|
|
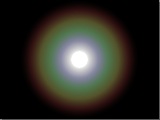
| Examples: On the left you see a visible light source with a white light color and a blue color for the halo. On the right you see a white light color and also white for the halo, but this time with the rainbow filter switched on.
|
|
|
| Visible, If Partly Covered - Normally, lens flares appear only if the light source is directly visible and not masked by other objects. For many purposes, however, it is very useful if the light source with the halo shines from behind objects, so that you can still see parts of the halo. In this event, the halo is not interpreted as a lens flare in the camera, but as a halo about the light source, as it seen in fog or rain, for example. This halo originates from the light reflections of the light-source through surrounding fine water droplets.
|
|
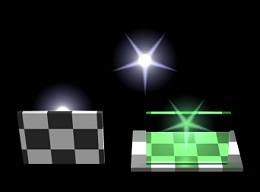
| In this picture are three light sources with identical parameters. The light source above in the middle is visible and so all light effects are valid. The light-source on the lower-left is partially visible. The option <Visible, if partly covered> is switched on, and you can still see the halo surrounding the light source. The light effects that would originate through reflections within the camera lens, (i.e. light stars, rings or spots) are, however, not calculated for masked lights. With the light source on the lower right we have one more special case - it is behind a transparent object. In this event the lens flares are supplied but, additionally, the color and intensity of the light source is filtered through the transparent object.
|
| Spotlights and Visibility of Lens Flares - With spot-lamps, lens flares and light halos appear only if the camera is within the light cone thrown by the spot. If, on the other hand, a visible halo is also desired, if the spotlight cone is aimed past the camera, the option <Visible, if partly covered> must be switched on. Light-stars and other effects, however, are only calculated if the camera is in spotlight cone.
|
|
|
| Visible Spotlight-Cones - In this chapter only lens-reflections and visible light-sources are discussed. CyberMotion can however also produce realistically rendered spotlight-cones.
|
| See also: Render Options - Volumetric Spotlight and Spotlight - Volumetric Spotlight Cone
|
|
|
| "Real" Light Objects - There are several ways to produce visible light objects in CyberMotion:
|
| With lens flares and light halos you can very easily add visible light effects, but in the end lens flares are only a simple post processing effect.
|
| Objects of any shape can be converted to light objects with real illumination attributes, but rendering of these area lights is very costly due to the manifold light- and shadow-sensors to evaluate.
|
| There is, incidentally, one more little trick with which you can generate a visible light source that combines wonderfully with the lens flare effects. Generate an object (for instance, a sphere) and choose a material color that matches with the light color. Then, set the material's <Glow> attribute to the maximum of 1.00. Also, switch on the option <No Shadows> as an object attribute in the material dialog. Then place a light source precisely in the center of this object. Finally, in the select objects dialog, arrange the light source in a hierarchically subordinated position to the new light object (simply drag the name of the light source on the name of the light object), so that the light source follows every movement of the light object.
|
|
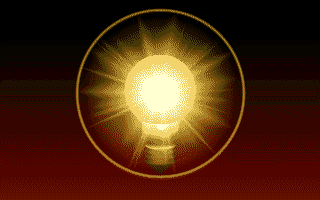
| Here is an example of a light bulb with a spherically shaped light object containing a point light source in it and additional light effects.
|
|
|

|
| Annular lens flares are sometimes seen around bright light sources. You can simulate this light effect by switching on the option <Lens flare - ring>. Again, you can overlay the light ring with a rainbow filter when you select the rainbow colored button.
|

|
| Radius: The <Radius> parameter allows you to edit the size of the radius of the halo ring.
|
| Width: The ring width is determined by this value.
|
|
|

|
| The option <Lens flare - Star> creates a star-shaped lens flare for a light source.
|
| Number of Rays: The number of base ray-arms. A star can comprise of a minimum of 2 to a maximum of 40 rays.
|
| Iteration: The number of iterations by which additional rays are generated on top of the base rays. For example, if you input a value of 4 for the base rays, and a value of 2 for the iteration, then the end result is star of 4 base rays plus 4 supplementary rays in the first iteration run-through plus 8 supplementary rays in the second iteration run-through. This produces 16 rays in total. The rays added are somewhat thinner and shorter per iteration. The minimum iteration number is 0, maximum is 4.
|
| Ray-Length: The basic size of a single ray-arm.
|
| Ray-Width: The width of a ray-arm. A value of 0.01 corresponds to very narrow rays and a maximum value of 1 produces a very wide ray - in which event the individual rays are barely distinguishable.
|
| Rotate: The angle of the first ray of the star from the vertical. With a low or odd basic ray number (3,4, or 5) it often appears better and more realistic if you give the star a slight rotation, so that it is somewhat out of alignment with the edges of the picture. Another beautiful effect is also possible: a star with only 2 rays and no iteration, rotated through 90 degrees, lies exactly horizontal. You have probably seen this type of light effect already in many films.
|
| The angle value can be animated. By the inputting different angles in keyframes, you can produce a rotation of the star effect in animations.
|
| Random: The random-function generates an asymmetrical star halo. The random generator can be initialized with a value between 0.01 and 1 for different random results.
|
| Examples:
|

|
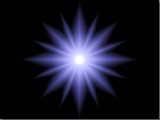
| Number of rays: 4, iteration: 1, width: 0.08.
|
|
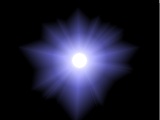
| Number of rays: 4, iteration: 2, width: 0.35, length: 85.
|
|
| Number of rays: 4, iteration: 3, width: 0.70, length: 85.
|
|
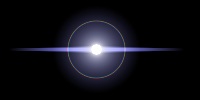
| Number of rays: 2, iteration: 0, width: 0.04, length: 85, rotation: 90.
|
| Light radius: 8, halo radius: 15.
|
| Light ring: radius: 18, width: 3
|
|
|

|
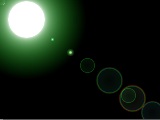
| This type of lens flare generates multicolored rings and circles running out from the light source, diagonally through the focus of the picture. In films, this effect is often seen if, during filming in the countryside, the camera, in panning, catches the sun and lets these spots run through the picture. You can also use this light effect very effectively in animations. With the three ring-type buttons you can again choose to overlay the rings with a rainbow filter or not. If you select the third button in the row, then both types of rings will be mixed.
|
|
| Number: This value gives the number of spots to be calculated.
|
| Size: The maximum size of a spot. The actual size depends on the random generator and, as with all other light effects, also on the distance of the light source from the camera.
|
| Intensity: The maximum intensity of a light ring from 0.01 to 1. Additionally, the intensity of the color of the light-ring is determined by the colors of the light and halo and is dependant on a random value.
|
| Random: The starting value for the random generator. Changing the initialization value can generate many different variations in the light effect.
|
|
|
| Once the general shape has been edited via the various effect parameters you can resize the resulting lens flare effect with the Global Scale parameter as a whole object.
|


